Note: This Blog is being redesigned and is under construction;
some features may not work properly for a few weeks.

Writing Nonfiction Books (Part 14)

Nonfiction

Book Proposal

"You never get a second opportunity to make a good first impression." – Mark Twain.

Most publishing houses and agents want to receive a book proposal rather than an entire manuscript. A few publishers prefer only a query letter. An editor or agent spends an average of twenty minutes reviewing your book proposal, so it is imperative that you provide the correct material and that your manuscript looks professional. To determine the submission format for each publishing house, check the Christian Writer’s Market Guide or check each publisher’s writers' guidelines online.

There are many different ways to do a book proposal. I am giving you the simplest form. If this is your first book, you want editors to read an actual chapter in the 20 minutes they will allow you. I would suggest trying to keep your proposal under 40 pages.

If an editor or agent requests a manuscript from you, in that case, follow those specific guidelines. For example, New Hope Publishers, which my recent books are with, wanted a detailed proposal. Our first one was 54 pages, but keep in mind this was requested material.

Next week we will discuss the cover or query letter.


Writing Nonfiction Books (Part 13)

Nonfiction

Timelines for Book Publishing

Here are timelines on two of my books to give you an idea of how long it can take from the time you present ideas to publishing houses to the time your book is actually released.

Wounded by Words timetable:
One-sheets and query letters, started marketing July, 2004.
  Was told we needed a professional involved.
Added family therapist as co-author and marketed proposal July, 2005.
New Hope Publishers offered contract December, 2005.
Book due to New Hope, August 1, 2006.
Original release date, August 2007.
Actual release date, February 2008.

Too Soon to Say Goodbye timetable:
One-sheet, July 2006
Proposal, May 2007
New Hope Publishers offered contract December, 2007.
Book due to New Hope, October 15, 2008.
Release date, July 2009.
This book was put on the fast track.

Next week we will start talking about the actual book proposal.


Writing Nonfiction Books (Part 12)

Nonfiction

Reasons for Writing

Why are you writing? Is it to share your story with others? Is it to make money? Are you seeking personal growth? Most of my books sell wholesale. I make 22 cents-$1.50 a copy, partly because I co-author most of my books. I carpeted my house with one of my checks. I've discovered that I'm not in this business for the money. I feel that writing is a ministry. I need to make enough with my consulting, writing, editing, and teaching to live, so for me it has become a business. But my main reason for writing is that I want to change lives. I want to share something with others that will benefit them.

How do you know that God has called you to a writing ministry? Pray about it. Practice patience. Don't rush God, your editors, or yourself. It will probably take you at least a year to get your book contracted, a year to write it, and a year for it to come out in print, perhaps longer. It has been my experience that book editors and agents do not respond before two to three months, at least not if they are interested in your book. They can hold it six months or a year or two before making a final decision.

What kind of timeline can you expect when publishing a book? We will discuss this in our next blog.


Writing Nonfiction Books (Part 11)

Nonfiction

Creating a One-sheet

When you verbally pitching your book idea to editors, you will probably have only 15 minutes to sell them on your idea. Thus I suggest you leave something in their hands so they will remember you after the conference is over. Editors and agents will have talked to many people, and you want to stand out. You can accomplish this with a “One-sheet.” Also, there may be some editors you cannot get an appointment with. You can find a moment when they are free and hand them your “One-sheet.”

A “One-sheet” is one sheet of paper to hand out to editors that shows a book proposal project—thus the name. I would suggest printing it on your letterhead stationery so it will look professional. It should be single-spaced and done in block format.

It basically includes the same things that a cover/query letter would include and should basically answer five questions:

  1. Why are you qualified to write this book?
  2. What is it about (told in one paragraph)?
  3. Who is your audience?
  4. Why will this book be marketable?
  5. What is your marketing plan?

Next week we will talk about your reasons for writing.


Writing Nonfiction Books (Part 10)

Nonfiction

An important part of pitching your book is what we call the “Thirty-second Pitch.” This can be used in a 15-minute appointment with an editor at a conference. If you pique an editor’s attention, he or she will want to hear more.

Here is my Thirty-second Pitch for one of my books. Wounded by Words: Healing the Invisible Scars of Emotional Abuse offers hope and healing through Christ from these unseen hurts. Women who have grown up with the harsh reality of verbal abuse understand the pain and suffering it causes. The results of this kind of mistreatment may not cause bruises and other visible injuries, but nevertheless, the scars are there. These scars remain in the heart and mind, causing fear, powerlessness, and dependency.

It's important to be able provide focus for your book in one paragraph. This can also go on your cover letter or one-sheet, which we will discuss in later blogs. Plus if you get an opportunity to walk to dinner with an editor or sit with him at a conference, but you weren't able to sign up to have an appointment with him, you can pitch that editor or agent on the run, so to speak.

Next week we will learn how to create a “One-Sheet” to hand out or send to potential editors and agents.


Writing Nonfiction Books (Part 9)

Nonfiction

Now look at the opening sentence and paragraph of the chapter you are working on, or at the section of that chapter. Do you have a strong hook? Does the reader want to keep reading? Many publishing houses and agents receive 5,000 to 10,000 proposals a year. If the editors aren't impressed by the first paragraph, they may not continue reading.

For many authors, beginnings are the most difficult part of the manuscript to write. After reading thousands of book proposals that come through our manuscript critique service, I see that it often takes the author two to three pages to reach the meat of his or her message. You will probably spend more time rewriting your lead paragraph and your first chapter than any other part of your book. Beginnings, for me, are the most difficult part of a manuscript to write.

Don't keep working on the beginning of a chapter, editing the material over and over again. Go onto another chapter and come back later with fresh eyes to the previous material. Writing requires a great deal of editing, but it helps not to dwell on one section for too long at a time.

Next week we will talk about “The Thirty-second Pitch” you will give to potential agents and editors.


Writing Nonfiction Books (Part 8)

Nonfiction

Now read through your chapter straight through for flow and focus. Make marks in the margin wherever you see a problem. Read it uninterrupted. You will see things on the overview that you might miss when you are going through your manuscript line by line.

Ask yourself these twelve evaluation questions.
1. Do I have a good lead?
2. Is my chapter interesting?
3. Is it significant?
4. Is my story or book marketable?
5. Does it have continuity?
6. Does it make sense?
7. Have I left out any important points?
8. Did I say what I wanted to say?
9. Are my transitions adequate?
10. Did I repeat my thoughts?
11. Did I use complete sentences?
12. Does my ending tie into my beginning?

Next week we will concentrate on your opening sentence and paragraph.


Writing Nonfiction Books (Part 7)

Nonfiction

Now let’s talk about the third step in my Three-Step Writing Process: 3. Self-editing. Allow each chapter to cool before beginning to self-edit. This is the longest stage of writing and requires both sides of the brain.

Did you go where you intended? If not, you either need to change your manuscript or change your outline. Sometimes you even need to change your premise, because you didn't go in the direction you intended.

Go back and look at your outline and theme sentence. Do they need revision? Does your chapter support your outline and theme for that chapter? If not, you need to change either your paragraph description or your first rough draft. Remember that neither is set in concrete.

What I'm saying is it's all right to change your mind. Your manuscript doesn't flow from your computer and settle in concrete. Sometimes the most basic parts of it eventually need to be changed. Be flexible and prayerful as you edit your work.

Next week we will talk about doing an overview of your work and asking yourself 12 questions.


Writing Nonfiction Books (Part 6)

Nonfiction

Writing the first rough draft is probably the most emotional birthing phase of the entire process of writing a nonfiction book. Once the words are on paper, you need to emotionally detach yourself from your baby. Lay it aside for a week and let it cool.

Go on to another chapter or on to another writing project. I suggest you go through this same writing process for each chapter of your book. Develop a focus, an outline, and then write the first rough draft. It might be a good idea to write the easiest chapters first if you are organized enough to determine those you can write quickly, or do them chronologically.

God inspires us to write, but He is not going to do our work for us—He will only guide us along the way. Writing the first draft is the creative part. For me, this is the easiest part. The hard part is rewriting, and rewriting, and rewriting. God never promised us that life would be easy, and He never said that writing would be easy. After over 40 years I still struggle with my writing.

Next week we will talk about the third step in my “Three-step Writing Process


Writing Nonfiction Books (Part 5)

Nonfiction

Step 2 of my Three-Step Writing Process is writing the First Rough Draft. To write your first rough draft, you use the creative (right) side of your brain.

Find a large block of uninterrupted time and write all the information you can think of regarding your book. Don't get hung up in grammar, punctuation, or phraseology. Write whatever comes to mind. Some of your chapters will be briefly outlined on this first rough draft, others may be in detail, and some won't exist at all.

You may choose to write a synopsis of the entire book, or you may want to take smaller chunks of your “elephant” so you don't get indigestion. On the first sitting, I write a brief overview of the book. After that, I usually write a chapter at a time, so I'm usually dealing with 15-20 pages at a time. I follow the same steps for each chapter. If there are personal stories within the chapter, I use the same process for each story.

Be sure to take a break after writing a rough draft. More tips on this will be given next week.


Writing Nonfiction Books (Part 4)

Nonfiction

Next create a preliminary outline before you begin the actual writing of your book. This may change as the writing progresses, but you need a guideline to start with. Your outline should be built around your chapter titles. Perhaps you have 10, 12, or more.

Then write a paragraph about each chapter. Be aware that this may change drastically, but it is important to get down as much information as you can. Each point must support the main theme. Each chapter, though self-contained, needs to promote the main idea of your book.

Example from Wounded by Words:

Chapter 1: Hurtful Words – Caustic words and demeaning statements can be as dangerous to our well-being as any weapon. People often use words that dominate and control when they feel insecure themselves. Unfortunately these words are often directed at close family members, often children, and the outcome is much pain and suffering. The tension resulting from these heated words often leads to the telling of lies by both parties.

This concludes Step 1 of the Three-Step Writing Process. Lay your work aside before continuing. Step 2 will be given next week.


Writing Nonfiction Books (Part 3)

Nonfiction

Now let’s talk about my Three-Step Writing Process regarding nonfiction books.

Step 1: Theme and Outline: First, decide what your main purpose is in writing this particular book. Where are you going? State your theme in one word. State it in one sentence. Know what you want to say, and say it. Keep to one subject. You are using the analytical (left) side of your brain to write your focus sentence. You will probably start with something general and refine it as you develop your book.

For an example, I am going to use my book, Wounded by Words: Healing the Invisible Scars of Emotional Abuse.

One word: abuse. Sentence: Now is your chance to break the cycle of emotional and verbal abuse and set yourself and your loved ones free.

The major problem with most book manuscripts that are rejected is they deviate from their premises. The writer tries to tell too many stories or attempts to make too many points in one book.

Step 2 and 3 will be covered in future blogs.


Writing Nonfiction Books (Part 2)

Nonfiction

Writing a nonfiction book involves many other things besides the actual writing. I also include reading, rewriting, and editing in my time. These, too, are important parts of the writing process. To write you must spend as much time reading as you do writing. You will gain ideas for your own writing, and it will help you develop your own writing style. Also you need to read articles and books on the subject you are writing about to better educate yourself on your subject.

Writing is starting with a blank computer screen and putting one word down after another. And the more information you have in your head at the time you begin, the easier the task will be. If you wrote a page a day, you'd have 365 pages at the end of a year. Of course those wouldn’t be edited pages, but we will discuss that in later blogs.

Next week we will talk about my Three-Step Writing Process.


Writing Nonfiction Books (Part 1)

Nonfiction

Beginning

We will begin a long series on writing nonfiction books from the formation of an idea to a final product. Writing a book is like eating an elephant. A person does not dare to attempt the project in one sitting! We will cover book proposals, writing the entire elephant, and contract negotiations. You’re reading this because you want to write, to get your book published, and to glorify God. Right? You can use these same techniques for articles, stories, and fiction, as well as nonfiction books. Are you published?

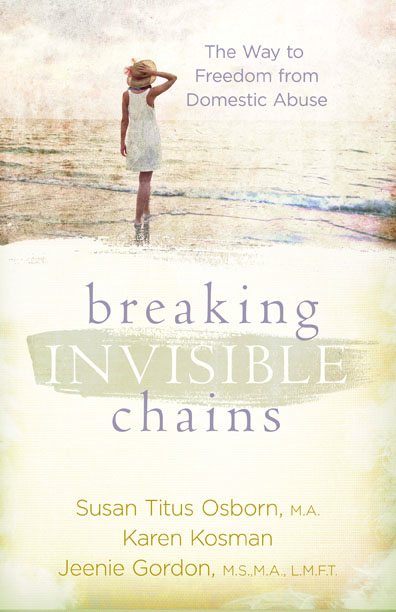
Over 40 years ago when I began writing, I made a commitment to God and to myself that I would write for an hour every day. I started writing Sunday school take-home papers. Now I have over 30 books in print, my latest being on domestic violence, titled Breaking Invisible Chains. However, with running my critique business, editing manuscripts, and teaching students to polish their writing, I still struggle with finding time to write my own books! What kind of a commitment are you willing to make? Perhaps you could start with a promise to write for an hour a day. If you spend that much time daily, I can guarantee that on many of those days you will spend much more time.

Next week we will talk about what is involved in writing a nonfiction book.


Titles with Pizazz (Part 3)

Titles

When Is Your Title Right?

How can you know when your title is right? The acronym "ACE" will help you create a memorable title.

"A" is for accurate. The title must truthfully reveal the focus of the article and also fit its tone. You wouldn't put "Buffalo Bob Bites Bullet" on a serious crime story any more than the President would turn up for a televised press conference in a sweatsuit.

"C" is for concise. Five to seven words are a typically good length. Active verbs, specific nouns, and descriptive adjectives help tighten the message.

"E" is for eye-catching. You have just a few words to convince your readers you can provide what they want. So you appeal to their felt needs, whether that is for information, inspiration, consternation, or confirmation. One study showed the use of pronouns ("you," "I," "they") and the "how-to" approach made for stronger titles.

Put a lot of thought in a title before sending your manuscript to an editor. The first person you need to impress is at the publishing house, so they will publish your article or book.

This concludes the series on titles.


Titles with Pizazz (Part 2)

Titles

To create a good title, look for key phrases that seem to sum up the article or book. Watch for sentences that catch your eye as you read through—perhaps they will captivate your reader, too. I wrote an article about a man who escaped from Vietnam. He felt his escape was made possible by the providential hand of God, so I named the article, “The Providential Escape.”

Another way to catch the reader’s attention is by reversing words or by changing one word in a common saying to create your own saying. “Forget and Forgive” is a devotional I wrote on forgiveness. Using “Forgive and Forget” would be overuse of a tired cliché. “Take This Job and Love It” is another example of a good play on words.

If you are writing a mystery, use words that show intrigue. Anonymous Tip and Final Witness are book titles that do this well. The reader wonders, Who will be the final witness? Be careful, however, not to tell too much in the title. “John Overcomes Cancer to Win the Race” probably doesn’t leave much for the reader to learn from reading the story.

Titles should be easy to pronounce and yet have pizzazz. The more memorable your title, the more apt your article or book is to be read and remembered. The Purpose Driven Life is an excellent example that is simple, memorable, and meets the reader’s needs.

Next week we will talk about using the ACE method for creating a good title.


Titles with Pizazz (Part 1)

Titles

The title of your article or book is as important as its beginning. The title is what you use to hook the readers, so it must be eye-catching. Many readers buy a book on impulse by looking at the title. Many readers buy a magazine because an article title piqued their interest. Some readers thumb through a magazine or browse a website, checking titles and reading only the articles for which the title grabbed their attention.

Titles need to be accurate. They should express specifically what will follow in the article. Readers don’t want to feel cheated because they thought they were getting something totally different than what your article or book delivered. If your subject matter is serious, also make your title serious. Example: “A Cry for Acceptance.” If your material is humorous, you can make the title funny, too. Example:“Turning Frogs into Princes.”

Titles are usually concise. A good rule is to keep your titles five to seven words. Use active verbs, specific nouns, and descriptive adjectives to grab your readers. Also try to draw in readers, so they feel actively involved in your article or book. They need to feel there is something in it for them. All Cracked Up: Experiencing God in the Broken Places is a good example.

Next week we will talk about catching the readers’ attention with your title.


Twelve Ways to End Your Article or Story (Part 4)

Endings

Here are my last three suggested endings for articles, stories, or book chapters. I have given examples of each type of ending from chapters in my own books.

10. The Straight Statement Close - This editorial close consists of a few sentences or a final thought in the author's own words.

"I needed to allow others to be themselves. When I dated someone, I tried to accept him for who he was—not for who I wanted him to be. Through this time, I always felt God had someone special planned for me. When I was ready, and my ‘Mr. Perfect’ was ready, God would allow us to meet" ("Turning Frogs into Princes," Rest Stops for Single Mothers).

11. The Stinger - This unexpected conclusion provides an ending that startles, surprises, or shocks.

"Elbows jabbed their ribs; feet tangled with theirs; the unrelenting mob moved on until they came to the place where the old man lay. Bending down, they touched the old man's arm, now grown cold. They were too late" ("Too Little, Too Late," Potpourri of Praise).

12. The Word of Advice Close - This warning or word of advice points a verbal finger at the reader.

"Loving too much leaves us open to the danger of being hurt, but loving too little can cause us to forget how to love and forget how to live" ("Loving Too Little, Loving Too Much," Rest Stops for Single Mothers).

Whatever ending you chose, give your article or story a solid conclusion. Don't just let your story die. Provide the readers with food for thought that they can digest and use in their own lives to help others and themselves move closer to the Lord.


Twelve Ways to End Your Article or Story (Part 3)

Endings

Here are seven through nine of my twelve suggested endings. I have given examples of each type of ending from chapters in my own books.

7. The Anecdotal Ending - You can either end with an anecdote or use the split-anecdote technique in which you start the anecdote in the lead (or the middle somewhere) and complete it in the closing.

"Looking back over the past years, I never dreamed my life would take the path it has. When all I had to hold onto was a thread linking me to God, I learned to step out in faith and to take risks. If I had not been forced to earn a living, I never would have developed my current programs and ministries. After six years of being a single parent, I am now blessed with a supportive husband and a thriving business ("A Thousand Ways," Rest Stops for Single Mothers).

8. The Natural Close - Let your story end naturally. You've told your story. Stop.

"When Mobin visits foreign cities, as he was doing that day in the Maldive Islands, he still tells people, 'I collect telephone directories. Do you have one I can take home with me?'" ("Telephone Directories," Potpourri of Praise).

9. The Summary Close - This ending attempts to cover the highlights of the story or to tie up all the loose ends.

"How wrong my first impression had been. I was aware that God planned that therapeutic evening. He knew I would run out of wood, and although I hadn't specifically asked Him for more, He provided anyhow" ("A Surprise Encounter," Rest Stops for Single Mothers).

Ten through twelve endings will be given next week to conclude this series of blogs.


Twelve Ways to End Your Article or Story (Part 2)

Endings

Here are four through six of my twelve suggested endings for articles, stories, or book chapters. I have given examples of each type of ending from chapters in my own books.

4. The Play on Words - Sometimes alliteration, a slogan, or a catchy phrase sticks the longest with the reader.

"Pastor Ananda's burden for his flock, however heavy, is carried with joy and compassion. It fits him well. Each of us has our own divinely designed yoke—our own job to do. Suddenly I felt a renewed strength to wear the yoke God has fashioned for me" ("Pastor Ananda" Potpourri of Praise).

5. The Quote Close - Use a quote taken from a subject, history, or other source of quotations to add finality to the article.

"Angelic flames of light and heavenly choirs, accompanied by celestial harps and trumpets, turned a scene of earthly tragedy into a scene of heavenly triumph. From what they saw that day, and from 'God's Carvings', the Aucas learned what the Psalmist wrote: "Precious in the sight of the Lord is the death of His saints" (Psalm 116:15, “Dawa's Story," Potpourri of Praise).

6. The Add-On - This close can make a point never made in the story—a shocker or something that seems natural for making your final point.

"As we walked toward the refreshment table together, I realized that my lack of forgiveness had cost us both a great price" ("Forget and Forgive," Rest Stops for Single Mothers).

Next week’s blog will include three more ways to end a story, article, or book chapter.


Twelve Ways to End Your Article or Story (Part 1)

Endings

Next to your beginning, your ending is the most important part of your article or story. This is also true in writing books. When your readers get to an end of a chapter, you do not want them to place a bookmark in and lay down the book without a desire to pick it up again. I have a shelf full of books with bookmarks stuck in them—books I have never finished because they didn't hold my interest at the end of their chapters. I don't want my books sitting on other people's shelves unread.

Here are the first three of my twelve suggested endings. I have given examples of each type of ending from chapters in my own books.

1. The Lead Replay - This is a duplication or a rewrite of the lead sentence or paragraph or a restatement of the lead's theme.

"With the Lord leading the way, FEBC expands its ministry to move to the future as it lifts its eyes beyond the horizon" (Eyes Beyond the Horizon, Thomas Nelson).

2. The Proximity Close - Tap the material immediately preceding your final paragraph for a closing.

"Next time you are in a church, look carefully at the stained glass windows. Picture yourself as part of His magnificent stained glass window. Watch the sun piercing through each unique piece of glass. Notice how many shapes and sizes are necessary to form the whole.

Remember that the Master Craftsman started with one—one piece of fractured glass. What can we accomplish for His glory if we, too, start with one?" (You Start with One, Thomas Nelson).

3. The Restatement of Purpose - Occasionally, a vivid and colorful restatement of the article's purpose makes an effective close.

"God teaches us to pray specifically. He knew that car was important to Richard's education, so He spared it. With what took place, I learned an important lesson: When things look bleakest, God is there, showing His presence in the smallest details of our lives" ("The Fire," Rest Stops for Single Mothers, Broadman & Holman).

Three more suggested endings will be given in next week’s blog.


Beginnings (Part 3)

Beginnings

This concludes the series on eight different ways to begin an article, story, devotional, or book chapter. I have used opening paragraphs from some of my books as examples. Beginnings are very important, and I hope my suggestions will help you craft a good opening paragraph.

6. A Mood is set by using such phrases as: stared out the window, huge chunks of ice, shivered.

Staring out my hotel window on this winter's day in Washington D.C., I watched huge chunks of ice lazily drift down the Potomac River. I rubbed my arms and shivered—partly from the cold, but mostly from the memory forming in my mind (“Loving Too Little, Loving Too Much,” Rest Stops for Single Mothers).

7. A Question may be asked at the beginning or near the beginning of the story or chapter.

The front door was slammed angrily with a thud. My son stomped down the stairs and out of earshot. Only silence remained.

Why do I fight with my son? My stomach churned as I pondered this question (“A Gentle Attitude,” Rest Stops for Single Mothers).

8. A Quotation may be used to begin a devotional, a story or article, or a book chapter.

He who cannot forgive others breaks the bridge over which he himself must pass. –Author Unknown (“Forget and Forgive,” Rest Stops for Single Mothers).

Whatever vehicle you choose, make sure you grab the reader's attention immediately. Don't be afraid to jump into the action. You want your readers to keep on reading! This concludes the series on “Beginnings.” Next we will do a series on “Endings.”


Beginnings (Part 2)

Beginnings

The beginning of an article, story, devotional, or book chapter is very important. You need to grab the editor to get your material published and then grab your readers to have them read it. In my last blog, I gave you two suggestions for beginnings. Here are three more.

3. A Thesis is presented by this lead that explains a venture of faith. Also, a metaphor is used comparing stepping out in faith to walking down an unknown path. Antithesis is another vehicle found here with confidence and excitement contrasted with fear, and falling over the edge of a cliff contrasted with being sure-footed.

Stepping out on a venture of faith is like being propelled swiftly down an unknown path in the dark. There is confidence and excitement instead of fear. If the way leads suddenly over the edge of a cliff, faith says the foot will find support if God underwrites the venture (Chapter 3 – Eyes Beyond the Horizon).

4. Presenting a Problem to be solved is an excellent way to begin a story. It reaches out and grabs the reader.

My manager at the telephone company, where I worked as a service representative, called me into his office. "I just received a call from White River, Arizona. Your father didn't show up at work today, Susan. He is missing. His car was found parked on a mountain road—empty.”

I collapsed into a chair. A small voice inside told me my father was dead (“The Fatal Fall,” Rest Stops for Single Mothers).

5. Dialogue is an excellent vehicle for jumping into the action of a story. Here it is used in conjunction with the presentation of a problem to be solved.

"Mom, I had to abandon my car," my son's voice sounded breathless on the other end of the telephone line. "Flames were jumping across the highway. Burning branches fell into the back of my convertible."

"Are you OK?" I asked (“The Fire,” Rest Stops for Single Mothers).

In my next blog, I will give you three more suggestions for ways to start an article, story, devotional, or book chapter.


Beginnings (Part 1)

Beginnings

There are many ways to begin a book chapter, article, or story. Here are the first two of my eight suggestions, taken from two of my books, Rest Stops for Single Mothers (Broadman & Holman) and Eyes Beyond the Horizon (Thomas Nelson). The types of leads I suggest here can apply for devotionals and other short pieces, fiction and nonfiction stories, articles, and book chapters.

1. Narrative is used here to tell a mini-story from the narrator's viewpoint. In the example below, you can picture the sail boat catching the wind.

As I scanned the horizon, my eyes focused on a sailboat gliding out of the bay. It cruised smoothly for a moment until the sailor lost the direction of the wind. The mainsail flapped in the breeze, and the boat slowed to a near halt. The man turned the rudder and leaned his craft back into the wind. The sails caught the breeze, and soon the vessel glided swiftly out of the harbor (“Lean into the Wind,” Rest Stops for Single Mothers).

2. Characterization is often used as a lead. This description of Bob Bowman gives the reader an insight into his looks and personality as a teen. The description of the scene transports the reader back to L.A. in the 1930's.

Pushing the gas pedal against the floorboards, the proud eighteen year old owner of a beat up 1929 Ford sped along a dirt road that transversed dusty bean fields. His brown hair was slicked back with a wave, and his blue eyes stared straight ahead. The acres of weeds stretching before him would someday shudder beneath the ear splitting runway traffic of the vast complex known as Los Angeles International Airport (Chapter 2 – Eyes Beyond the Horizon).

Three more ways to begin articles, stories, and book chapters will be given in next week’s blog.


The Elusive Comma (Part 7)

When Commas Can be Omitted

For six sessions we have talked about places where we should use the comma. Now let’s talk about places where the comma may be omitted.

In a series whose elements are all joined by conjunctions, no commas are needed unless the elements are long and pauses are helpful.

Example: Is it by Beethoven or Brahms or Bach? Of course it would not be wrong to say: Is it by Beethoven, Brahms, or Bach?

When elements in a series involve internal punctuation, or when they are very long and complex, they should be separated by semicolons.

Example: The brown, fuzzy-wuzzy bear; the black and white panda bear; and the snowy-white, fat polar bear were all friends.

When an ampersand is used instead of the word “and,” as in company names, the serial comma is omitted. Example: Dooey, Soakum & Howe

These examples end our seven sessions on commas.


The Elusive Comma (Part 6)

Other Uses of the Comma

The comma denotes a slight pause. The effective use of the comma involves good judgment, with ease of reading as the main goal. A comma is used when a slight pause is intended. A comma usually follows “yes,” “no,” “well,” and the like, at the beginning of a sentence if a slight pause is intended. Likewise, a comma follows an exclamation “oh” or “ah” only if a slight pause is intended.

The abbreviation, “etc.” is both preceded and followed by a comma when it is the final item in the series. Such English equivalents as “and so forth,” “and the like,” are usually treated the same way. Example: Cats, dogs, parrots, etc., must be confined to cages when flying in airplanes.

A comma follows names or words used in direct address as well as in informal correspondence.

Example: Friends, I’m here to tell you an important story. Example: Dear Mary,

Next week we will talk about places the comma may be omitted.


The Elusive Comma (Part 5)

Commas in Lists of Items

According to The Elements of Style and The Chicago Manuel of Style, when listing three items, a comma is placed after the first and second items (Paper, pen, and writer). Some publishers omit the second comma, but they won't fault you for not knowing their style. The important thing is to be consistent, so the editor can match the style sheet to your manuscript. Plus, if the list contains multiple words, it can be confusing if you don’t add the second comma. (His pets consisted of a long-haired cat, a short-haired dog, and a very noisy parrot.)

The exception to this rule concerns the name of businesses such as law firms which usually omit the last comma (Dewey, Sokum and Howe).

To further complicate things, if the list of items includes commas, they should be set off by semi-colons (The blank, white sheet of paper; the black, fine-line pen; and the ready, spirit-filled writer).

Next week we will discuss other uses for the comma.


The Elusive Comma (Part 4)

Commas in Adverbial Phrases and Clauses

When the main clause of a sentence is preceded by a phrase or a subordinate clause, you may use a comma to separate the phrase. (Sitting in the back, the group cheered wildly.) or (During the performance, the group cheered wildly.)

If the interruption to the flow of the sentence is slight, however, the comma may be omitted. The comma is usually omitted after short, introductory, adverbial phrases. (On Tuesday Bill was absent from class.)

An adverbial phrase or clause located between the subject and the verb should usually be set off by commas. (Bill, after picking up his assignment, went home.)

Commas should be used to set off interjections, transitional adverbs, and similar elements that affect a distinct break in the continuity of thought. (On the other hand, Bill may be right.) (Yes, Bill was right after all.)

Commas in Lists of Items will be the topic of next week’s blog.


The Elusive Comma (Part 3)

Using Commas in Dialogue

There seems to be some confusion when using commas in dialogue. The commas and periods always go inside the quotation marks, whether single or double.  Example: “I want to go with you,” he said. Or:  He said, “I want to go with you.” I constantly see errors regarding this rule in print. The Chicago Manual of Style says this is the traditional style, and was used well before the first edition of the manual in 1906.

Question marks and exclamation points go inside if they are part of the dialogue and outside if they are part of the entire sentence. Example: Why did I keep hearing over and over in my head the words, “I’ll never forget you”?  Before he said good-bye, he asked, “Will I ever forget you?”

“Commas in Adverbial Phrases and Clauses” will be the topic of next week’s blog.


The Elusive Comma (Part 2)

Now let’s look at some basic rules regarding commas:

Independent Clauses

Always place a comma before a conjunction introducing an independent clause. In other words, place a comma between two independent clauses separated by a conjunction. Independent clauses have a subject and a verb, and they can stand alone. (The situation looked hopeless, but there was one remaining chance for success.) or (The situation looked hopeless, but I didn’t believe it.)

However, do not join independent clauses with a comma if they are lacking a conjunction. They need to be joined with a semi-colon, or they can be cut into two separate sentences. (The situation looked hopeless; there was one remaining chance for success.) or (The situation looked hopeless. There was one remaining chance for success.)

A common mistake made with the comma is to separate a dependent clause from an independent clause when they are joined with a conjunction. (I was told the situation looked hopeless but didn’t believe it.)  Each clause must have a subject in order to need a comma before the conjunction.

Misuse of the comma in this way is one of the most common errors made in writing.

The Elusive Comma (Part 1)

We are beginning a seven-part series on “The Elusive Comma.”

“The comma, which seems to cup the sense of the preceding phrase and hold it out to us, timidly and respectfully, is one of our greatest breakthroughs. The civilizing influence of this punctuation aid derives partly from its odd shape, the shape of mosquito larvae and sea horses: close inspection reveals the implied high culture of its asymmetrical tapering swerve, so distinctly an advantage over the more rustic period.” –Nicholson Baker

The punctuation error that seems to occur most often in the hundreds of manuscripts crossing my desk each year is misuse of the comma. It is important to learn when to use and when not to use commas. To make matters worse, The Chicago Manual of Style, The Associated Press Handbook, and most grammar books list different rules. Most Christian publishers have their own style sheets, but they basically follow The Chicago Manual of Style, which is the standard in the book publishing industry. Since it is costly, I suggest you buy Strunk and White’s The Elements of Style to help you with grammar, punctuation, and word usage. First copyrighted in 1935, this little 92-page book is packed with all the basics. It can be purchased inexpensively on Amazon.com.

Writing the Short Story (Part 5)

After you reach the climax in your story, be brief and be gone. Wrap it up as quickly as possible, being careful not to leave any loose ends. Once you have reached the climax, your readers won’t have any reason to keep reading.

Set your story aside for a week, then go back and rewrite and rewrite more. Ask yourself, “Will it hurt the story if I leave out this word, this paragraph, this entire scene?”  If not, take it out. Whittle away all the dead wood. Make sure your characters are well developed, and the main character solves his or her problem, averts disaster, or overcomes his opponent himself? Your scenes should move along smoothly and transition well from one to another. And also make sure you have not left any loose ends?

It doesn’t matter if you are writing fiction or nonfiction, you must use good fiction techniques. People love stories. They want to escape from real life into an imaginary adventure, but they need help with their problems too. You can meet their real needs by meeting their felt needs through the vehicle of fiction or nonfiction stories. And God can teach spiritual truths through your fictional or real characters. If you are writing about real people, you may want to change their names and/or possibly write the story under a pseudonym. We don’t want friends and family hurt by what we write.

This ends the blog series on “Writing the Short Story.”

Writing the Short Story (Part 4)

It may help to think through your story in scenes. (See previous blog for more information on scenes.) Each scene must move the story forward. If an event is unnecessary, leave it out. Even in a book, your writing must be tight.

Scenes include five things:

  1. Setting
  2. Antagonists
  3. Action
  4. Somebody wins
  5. Resolution

Build suspense as you go along. Keep your readers guessing. Before a conflict is solved, put a barrier in your main character’s path. Don’t give the story away. Once you get into novel writing, you can confront the main character with conflict upon conflict, but in short stories stick to one conflict. Keep your readers hanging on a cliff. In novels, try to end each chapter on a cliffhanger. If you don’t, the readers might put your book down and never pick it up again. Don’t you have half-read books on your shelf?

Stories need to be filled with action. Stay out of your character’s mind, and keep the story focused on his or her activities. Once in a while, you can tell us what the main character thinks, but not all the time. Help your readers identify with the main character and the problems he or she is experiencing.


Writing the Short Story (Part 3)

Short stories and novels have a beginning, a middle, and an end. Write the beginning and the end before you go back and fill in the middle. You may change some things as you go along, but you must have a game plan.

Another way to phrase this is the three O’s:

Objective  –  Beginning

Obstacle   –   Middle

Outcome   –  End

In the first paragraph of your story, you must hook your readers. Open with an exciting beginning that makes them want to read on. Also open with the viewpoint character. Write your story as seen from one person’s viewpoint, either first or third person; third person is usually easier to write. Paint a brief picture of your main character, showing their personality, so the reader can see that person and identify with them.

Example taken from The Hair Pulling Bear Dog by Lee Roddy:

At first, D.J. Dillon thought the terrible nightmare had returned. In his sleep, he again heard the squeal of brakes, the crash, and then the awful silence. The 13-year-old boy’s blue eyes blinked open. He stared into the soft moonlit darkness of the kitchen where he slept on a rollaway bed.

His blond head turned automatically toward his parents’ bedroom wall beside him. He started to call softly, “Mom?” Then he remembered.

She was dead six months now, killed in that auto accident. The mountain’s silence had carried the sound for miles. D.J. had heard it up the canyon without knowing who was in the collision.

Memories flashed over him again. The hurt swallowed him like a silent, ugly monster. D.J. started to turn over and bury his face in the dusty pillow when he heard the crash again-but now he was wide awake!


Writing the Short Story (Part 2)

Now write a synopsis of your story (whether it is true or fictional). Eventually this will form the body of your story. On the first draft, let it flow down on paper. Don’t worry about grammar, punctuation, or phraseology. Just get your story down. If you think of small details as you go, include them. But don’t worry about your construction in this first rough draft. Leave yourself free from constraints so your creative juices can flow. After it is written, lay it aside and let it cool.

Now go on to work on another project. Have a file folder or a folder on your computer labeled with the name of each project you are working on. Keeping organized records is imperative. Every time you find something pertaining to that idea, place it in the file. You may prefer to keep your files and research material electronically on your computer, but I would always suggest you have a hard copy backup.

God inspires us to write; I’m convinced of that. But God doesn’t tell us the words will flow down on paper and settle in concrete. He is not going to do our work for us—He will only guide us along the way. Writing the first draft is the creative part. For me, this is the easiest part. The hard part is rewriting, and rewriting, and rewriting.

Remember that I told you to write a theme sentence and to make an outline before you began the actual writing. Then get as much down on paper as you can without worrying about the structure. Now let’s go back and put in the actual structure in the next blog.


Writing the Short Story (Part 1)

Currently, one of the fastest growing markets in all of Christian writing is fiction. However, if you are a beginning writer, I do not suggest you start with a novel. Instead, write a short story for a church school take-home paper or an online website. See The Christian Writers Market Guide for a list of markets.

The tips I give will work for fictional techniques in nonfiction pieces, such as personal experience stories, as well as for short anecdotal stories written within nonfiction articles and books.

An excellent definition of fiction is given by author Lee Roddy. “Creating characters in conflict culminating in crisis and change with commentary.”  The four key words are character, conflict, crisis, and change, called the “4 C’s of Fiction.”

A story is comprised of three elements: theme, plot, and character. Normally you can think of theme as the foundation on which the story sits. Your focus sentence will be based on the theme or main point you are trying to achieve. The story is either character-driven or plot-driven, depending on whether the main character is the most important element or whether the storyline is more important. These three qualities are always integral parts of your story, regardless of your emphasis. Think of them as forming a triangle with the theme as the base.

As in other writing, whether books, articles, or stories, form a focus sentence before you begin. This is the glue that holds the entire story together. The structure will be different for fiction than for nonfiction. Also, write a rough outline or a short running synopsis of the story. This may change as the story unfolds, but you need to have a plan in mind even though this may end differently.

Time Management Tips (Part 4)

Last week you were given Tips 7-9 for Time Management. Here are Tips 10-12 to help you manage your time, so you will be able to find more time for your writing.

  1. Keep Accurate Financial Records

Keep a ledger of expenses and income for your writing. Excel is an excellent computer program for keeping financial records. If you are making a serious attempt to run a business, you can write off the expenses on your tax return. Get receipts for your postage, office supplies, telephone calls, and dinners with editors. Also, if you drive to an interview or other job-related function, mileage can be deducted.

Keep track of your submissions—what is out in circulation, where you sent it, and when you e-mailed it.

  1. Avoid Procrastination

Have you heard people say, “I’ve always wanted to be an author. I’m going to write when the children grow up, when I retire, when my husband retires, etc. Someday, when I have the time, I’m going to…” If you are going to become a writer, you need to start right now.

  1. Touch the Lives of Others

Writing is 99 percent perspiration and one percent inspiration. It takes a little talent, a strong desire, and a lot of hard work. If you manage your time properly, you will find time to write. Remember what I said at the beginning: God gives us enough hours to do all that He wants us to do. We have 86,400 seconds every day. Let’s use this time to glorify God in all we do.

This concludes the series on Time Management Tips for Writers.

Time Management Tips (Part 3)

Here are tips 7-9 to help you manage your time, so you will be able to find more time for your writing.

  1. Find a Quiet Place to Concentrate

When you write to glorify God, He deserves all of your attention. You can’t concentrate if the TV is blaring, the phone is ringing, or children are screaming. You need to find a place that is free from interruptions.

  1. Keep Your Body as Well as Your Mind in Shape

If you eat properly, get enough sleep, and exercise regularly, your mind will be sharper and more creative. Also, go out and participate in activities. In order to pull information out of your mind, there has to be a storehouse from which to withdraw it. Have you ever experienced a time when you were pulling more out than you were putting in? Didn’t you feel drained? Read. Read for pleasure as well as things related to what you are writing. You should spend as many hours reading as you do writing.

  1. Organize Your Work

Keep your home-office looking professional. Organize each writing project in a file folder as well as on your computer and on and electronic backup. Label each folder as you obtain ideas for articles or books. What may start out as an article file on “Dealing with Stress” may turn into a book five years down the road. Place everything you find regarding that subject in your file folder and/or computer file.

Tips 10-12 will be given in next week’s blog.